
Grouting Basics for Mosaic
Grouting is an essential part of the mosaic process, but it can seem intimidating if you’re new to the craft. Don’t worry, I’ve got you covered!
In this post, I’ll share some best practices and step-by-step instructions for grouting your mosaic masterpiece using traditional sanded or unsanded grout. But before we dive in, let’s talk about when it may be appropriate to skip grout altogether.
When to omit grout
Grout can get stuck in the pitted surface of textured or porous materials (like most smalti and some stained glass). This creates a spotted or mottled look. It can also rub away the surface decorations of some beads or painted ceramics, which can be very disappointing if unintended.
If you’re concerned about these effects, always do a small test run with scrap materials you won’t mind discarding. Some artists choose not to grout at all if their chosen materials aren’t suitable. Others carefully apply painters tape over the exposed surface of tesserae that they don’t want the grout to damage or discolor.
Why grout?
While that sounds like a lot of work and you may be thinking “why risk it?”, there are a lot of good reasons to grout your mosaic.
Grout protects the substrate and adhesive. If you choose not to grout, you will need to use cement mortar (thinset) to adhere your tiles to your substrate, or you will need to keep your mosaic inside and protected from any moisture.
Grout adds cohesion. The act of filling the gaps between tiles levels the surface and smooths over any rough edges. It makes the artwork touchable and interactive. If the grout color you choose is similar to the tesserae colors, it can blend your overall image, reducing contrast and giving the artwork a mellow or subdued feel.
Grout can fracture an image. Often, bold grout lines are the whole reason an artist chooses mosaic as their medium. A dark grout with brightly colored tiles can fracture an image and push the colors to the foreground, to dramatic effect.
Grout is the finishing touch. A lot of artists feel that a mosaic doesn’t look quite “done” until there is some well-chosen grout.
How to grout
Here are the steps to follow when grouting a mosaic artwork using traditional sanded or unsanded grout:
-
Prepare your grouting area: Grouting is messy, and it is unsafe to inhale the dust created during grouting. Choose a well-ventilated area where you can put down protective material (like newspaper or a tarp) to make clean up easier. Also, as a cementitious material, any leftover grout or water used to clean grouting materials should never be poured down the drain. You could end up with a cement blockage in your pipes! I always take reusable grouting materials (the mixing container, etc.) outside to clean with a garden hose.
- Gather your materials: You’ll need:
- grout
- if the gaps between your tiles are less than 1/8 of an inch, choose unsanded grout
- if the gaps between your tiles are between 1/8 to 1/2 an inch, choose sanded grout
- water
- a container to mix grout (I love a silicone bowl because they are easy to clean)
- newspaper
- a disposable soft dry cloth (old t-shirt or cheesecloth)
- cotton swabs and/or toothpicks for fine cleaning
- a respirator or dust mask (an N95 will work well)
- rubber gloves, disposable or reusable
- a clock or timer
- Weldbond glue (optional)
- a grout float (optional)
- grout
-
Check that you have enough time: You don’t want to start grouting and then step away before the job is finished. If you do, you could risk permanently adhered grout or the dreaded “grout haze” on the surface of your tiles. Time needed will depend on the size of your project.
-
Consider doing a “weldbond wash”: If your tesserae are transparent, grout that finds its way under the tess can show through in what is called “grout bleed”. This can be unsightly. To prevent it, mix Weldbond glue 1:1 with water and paint it over your mosaic to coat the surfaces between the tiles. Let it dry before grouting.
-
Put on your mask: Safety first!
-
Mix the grout: Follow the instructions on the grout package to mix the grout to the desired consistency. You want the grout to be thick but not too stiff, so add water as needed until you achieve the right consistency. When unsure, aim for the consistency of peanut butter. Note: if you are adding grout colorant, do that in this step. More on that in another blog post.
-
Let the grout “slake” (5 minutes): After mixing, let the grout sit for 5 minutes. You’re allowing the grout to absorb the moisture, which sets a chemical reaction in motion (very important!).
-
Mix again: After slaking, give the grout one more good stir. Now you’re ready to apply.
-
Apply the grout: Use gloved hands or a grout float to spread the grout evenly over the surface of the mosaic, pressing it firmly into the gaps between the tiles. Be sure to get the grout into all the corners and crevices.
-
Let the grout dry slightly (10 minutes): Allow the grout to sit for no more than 10 minutes. You are waiting for the grout between the tiles to set or firm up before cleaning the excess off the surface. If you are grouting a large piece, consider that the areas you grouted first may be ready for cleaning by the time you finish applying grout everywhere. If it is a very large piece, consider grouting in sections.
-
Clean the surface: Use crumpled newspaper or a dry cloth to wipe away the excess grout on the surface of your tiles. Try to leave the grout between tiles flush with the tile surface. Push it back in if it pulls up. Discard the used newspaper and get a clean piece when needed. This takes some time, so be patient and keep at it. When most of the surface grout is wiped away, move on to the next step.
-
Dig out any hidden tesserae: Sometimes grout can build up near the edges of thicker tiles. If the surface of any tile is partially hidden after grouting, now is the time to dig it out. My favorite tool to use for this is a toothpick.
-
Buff the tiles to remove the haze: Use a clean dry cloth to gently buff the surface of the tiles to remove any hazy residue left behind by the grout. This is where the mosaic really starts to shine, enjoy it!
- Let the grout cure according to the package instructions. This usually means keeping it in a cool, dry area for a day or two.
Grouting instructions can vary by manufacturer, so be sure to check the container for any brand-specific instructions.
Note that this is not the only way to grout. What’s described here is the “dry grouting” technique. I may discuss other methods in future blog posts. Stay tuned!
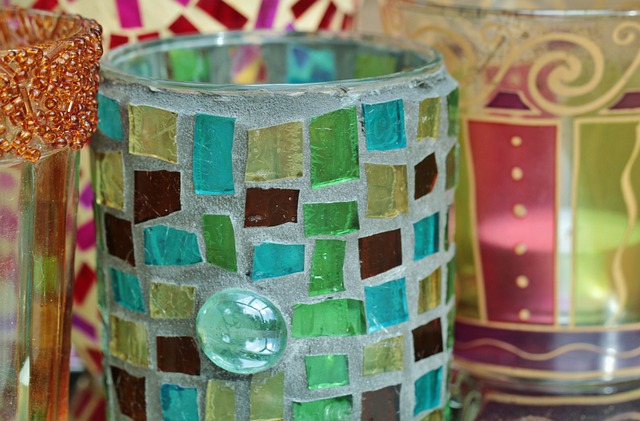
Cover image by Anja from Pixabay
As an Amazon Associate and participant in other affiliate programs, this post may contain affiliate links. I earn a small percentage from qualifying purchases via these links.